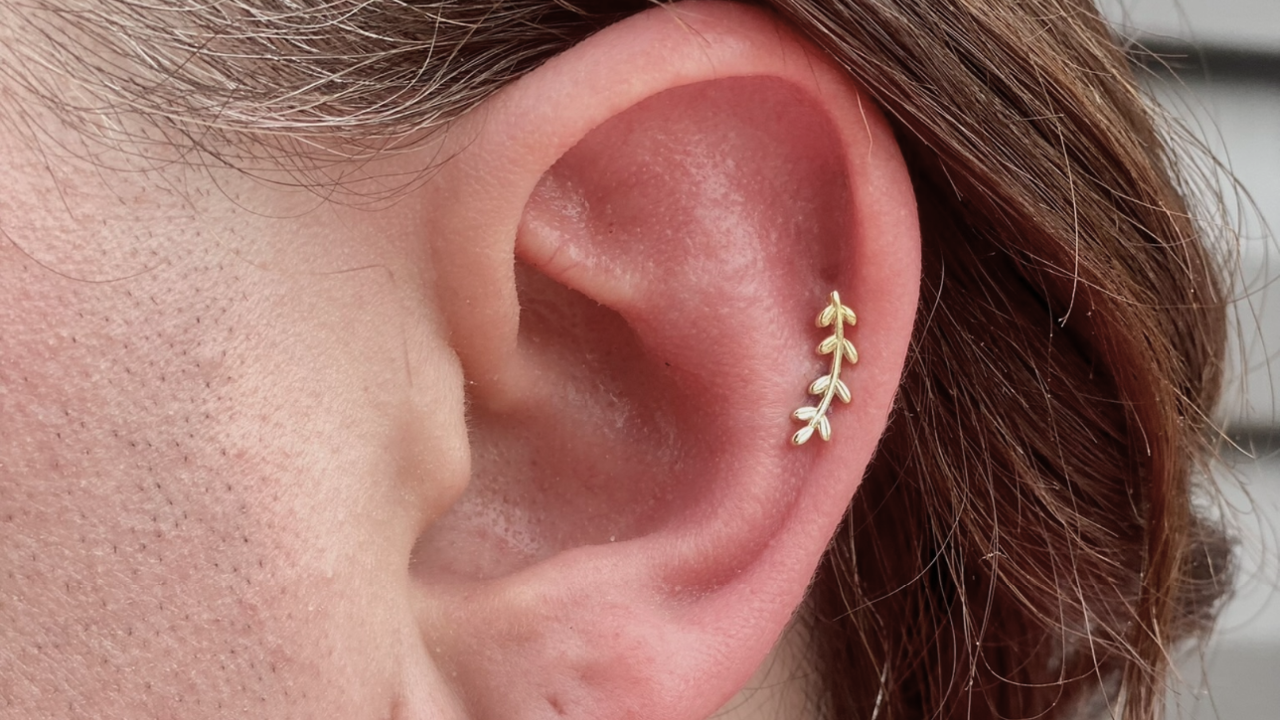
Cartilage vs. Helix Piercings- What's the Difference?

What is a Cartilage Piercing?


When exploring types of ear piercings, it’s common to hear terms like “cartilage” and “helix” used interchangeably—but there’s a small, important distinction. Cartilage refers to the firmer parts of your ear. It includes several piercing locations, such as the helix, conch, tragus, rook, and more.


What is the Helix?


The helix is a specific spot within the broader category of cartilage piercings. The helix is located along the outer edge of the ear and is one of the most popular placements.


Beyond the Ear


Other piercing placements involve cartilage, too! The nostril is also made up of soft cartilage, not just skin. While it's thinner and more flexible than ear cartilage, it’s still firmer than fleshier areas like the earlobe or navel.


Healing 


Healing a cartilage piercing is a different experience compared to piercings that go through softer tissue. Cartilage has less blood flow, which means it generally takes longer to heal. You might be looking at several months, sometimes even up to a year, for a complete heal. Softer tissue piercings often heal more quickly and with fewer complications, thanks to better circulation. This difference is key when planning your aftercare and managing expectations.


So, What's the Difference? 


It’s easy to see why the terms “cartilage” and “helix” get used interchangeably—they’re closely related, but not the same. “Cartilage” refers to the firm, flexible tissue found in various parts of the ear and nose, and a cartilage piercing is any piercing that passes through this tissue. The helix, on the other hand, is a specific area along the outer upper edge of the ear. So while every helix piercing is technically a cartilage piercing, not all cartilage piercings are helix piercings. Understanding this distinction can help you better communicate with your piercer and choose a placement that fits your style. 


RSS icon Facebook icon Twitter icon Instagram icon Copy Link icon

Gold or Silver? How to Pick the Perfect Jewelry Colour for You.


Jewelry is more than just an accessory—it’s a reflection of your style and a way to enhance your natural features. Choosing the right metal or gemstone colour can make a big difference in how your jewelry complements your skin tone, wardrobe, and overall aesthetic. But with so many options available, how do you decide which colour suits you best? And what about mixing metals? Let’s break it down.


How to Match Jewelry to Your Skin Tone


Your skin tone determines which metals and gemstones will complement you best. While personal preference should always come first, understanding colour theory can help you make more intentional choices.


1. Determine Your Undertone


Looking at your veins in natural lighting- what colour are they? 


  • If the veins on your wrist appear blue or purple, you likely have a cool undertone.


  • If the veins on your wrist appear green, you likely have a warm undertone. 


  • If they appear to be a mix of green and blue, you likely have a neutral undertone.


2.  Match It

Warm Skin Tones: Yellow and rose gold will enhance your natural glow. Rich earthy-toned gemstones, such as amber, citrine, garnet, and warm greens, can create a beautiful contrast.


Cool Skin Tones: Silver jewelry, including white gold, titanium, and platinum, will likely best complement your complexion. Cool-toned gemstones like sapphire, amethyst, emerald, deep purples or blues enhance cool skin tones.


Neutral Skin Tones: If you have a mix of warm and cool undertones, you’re in luck! Both gold and silver will suit you, and you can experiment with a variety of gemstones. Classic options like diamonds, pearls, and soft pinks are universally flattering.


Consider Your Style and Wardrobe


Beyond skin tone, your style and wardrobe play a huge role in jewelry selection. If you have a more eclectic style- opt for bold, statement-making jewelry that stands out against your clothing. If your style is more minimalist, delicate pieces can add a subtle touch of elegance. Also, consider what colours you wear most often—if your wardrobe consists of cool-toned hues like blues, greys, and purples, silver might be a more cohesive choice. If you wear warm tones like reds, oranges, or browns, gold jewelry will blend seamlessly.


Can You Mix Metals? Absolutely!


No rule says you should stick to one metal. Mixing metals can create a layered, dynamic look that feels modern and stylish. Here’s some tips on how to do it effectively:


Balance the Proportions: Instead of wearing equal amounts of each metal, let one take the lead. For example, wear mostly gold jewelry with a few silver accents, or vice versa.


Stack & Layer: Stacking rings in different metals can create a visually interesting contrast. Try mixing gold and silver hoops, or layering a delicate silver chain over gold pieces. 


Consider Texture & Finish: Mixing polished pieces with textured silver or matte metals can add even more depth to your look. 


The Bottom Line: Wear What Makes You Feel Confident


At the end of the day, there’s no “wrong” colour when it comes to jewelry. Trends come and go, but your personal style is what truly matters. Whether you stick to one metal or mix it up, the best choice is the one that makes you feel confident and expresses your individuality. So go ahead—experiment with different colours, mix metals, and have fun finding your signature jewelry style!


RSS icon Facebook icon Twitter icon Instagram icon Copy Link icon

Is It Time to Downsize Your Piercing?

Getting a new piercing is exciting, but healing it properly takes more than just cleaning—it also means knowing when to downsize. Downsizing your jewelry is a key step in preventing irritation, reducing the risk of bumps, and ensuring a smooth healing process. If you’ve ever wondered why your piercer recommends switching to a shorter post, this guide will explain everything you need to know about when, why, and how to downsize for the best results.


What Is Downsizing?


Downsizing refers to switching your initial piercing jewelry to a shorter bar or post after the initial swelling has gone down. When you first get pierced, you will have longer jewelry to accommodate swelling and prevent complications. However, once the swelling subsides, that extra length can become unnecessary and problematic. This is where downsizing comes in—it ensures a better fit, improves comfort, and reduces risks associated with wearing jewelry that’s too long.


Why You Should Downsize.


Leaving an overly long bar in can cause a few issues. First, it increases the risk of irritation and trauma since the jewelry has more room to move, it can also get caught on clothing or hair more easily which can lead to bumps or a prolonged healing time. Additionally, a longer post creates more space for bacteria to collect, raising the chances of infection. By switching to a shorter, properly fitting piece of jewelry, you can avoid these problems and keep your healing process on track.


When to Downsize


The ideal time to downsize varies depending on the piercing, but generally, it’s recommended about halfway through your piercing healing time. Some areas, like tongue piercings, need to be downsized sooner—often within two weeks—due to rapid swelling and healing. Other hard cartilage piercings (Helix, rook), may require more time before they’re ready. Your piercer will be able to assess your healing and let you know when it’s the right time to switch to a smaller piece.


Do You Always Have to?


Not every piercing requires downsizing, but for many, it’s strongly recommended. Some styles of jewelry, such as hoops, don’t have a downsizing step, and certain piercings may not experience significant swelling that warrants a change. However, if your piercing was done with an intentionally longer bar, it’s in your best interest to downsize when the time comes. If you’re unsure, check with your piercer—they can guide you on whether a shorter post is necessary for your piercing.


Downsizing is a simple but crucial step in the healing process that can prevent unnecessary issues and help your piercing settle in comfortably. If you’re approaching the right time to switch, have a check-up with your piercer to ensure your jewelry is the perfect fit.


RSS icon Facebook icon Twitter icon Instagram icon Copy Link icon

How Anatomy Affects Piercing Placement, Jewelry & Healing

Anatomy: the structural makeup, especially of an organism or any of its parts.
 

When we say a piercing is "anatomy dependent," we’re talking about how your body’s unique shape and structure influence which piercings will work best for you. It has nothing to do with whether or not we think it would look good, your weight, or anything else other than the shape and formation of the tissue. Proper anatomy is crucial to the success of a piercing. Let’s talk about it. 


Anatomy and Piercings

How are they related?


Even if you don’t realize it, every piercing begins with an assessment of your anatomy. This means that the piercer will look at the area you want pierced, examining the shape, thickness, and position of the tissue. For example, when you get an anatomy check for an industrial piercing, we look for a large ridge on your outer ear to hold the jewelry securely, and a flat surface for the bar to sit across. For a tongue piercing we look at the veins to make sure none run down the center and that your frenulum (sometimes people call it the “web”) is not too short or prominent.

In short: an anatomy check ensures that the piercing will be safe and heal successfully. 


Why It Matters

Ignoring anatomy can lead to several issues, from discomfort to more severe complications. Piercings placed incorrectly are prone to rejection, migration, or scarring. Certain piercings require precise placement to avoid hitting nerves or causing excessive bleeding. An experienced piercer’s knowledge of anatomy helps navigate these risks.

Plus, your anatomy doesn’t just influence where a piercing can go-it also determines what type of jewelry is appropriate. Flat-back studs, curved barbells, captive bead rings, and other styles all serve different purposes and work best for specific piercings. A curved barbell, for example, is ideal for a rook piercing because it follows the natural contour of your ear. On the other hand, a straight barbell would cause unnecessary pressure and hinder the healing process.


In Conclusion...

If your anatomy isn’t suitable for the piercing you want, we can usually suggest an alternative placement or style- like the faux-industrial pictured above. Our goal is always to avoid complications like migration or rejection and make sure your piercing heals successfully. But sometimes we just can't make it work. We never want to tell a client “No” but when we do- we promise it’s for a good reason. 

RSS icon Facebook icon Twitter icon Instagram icon Copy Link icon

Traditional & Floating Navel Piercings

In this blog post, we're talking about navel anatomy and exploring two popular navel piercing styles: traditional and floating navel piercings.


What is Anatomy? 

Anatomy is defined as the study of the structure or internal workings of something.


Since individual anatomy varies greatly, the suitability of specific piercing styles will differ from person to person. When you come in for a piercing, one of our piercers will assess your anatomy and guide you on the most suitable piercing style based on their expertise and knowledge.


What is the Piercer Looking For?


When a piercer examines your anatomy, it's to look for specific physical qualities. Certain qualities determine if your navel can be pierced safely and successfully. First, they’ll check for a prominent flap of skin above the navel that can securely hold the jewelry. The depth of your navel is also important. It has to be deep enough for the jewelry to sit in. In addition to structure, the piercer is looking for any scarring from previous piercings or surgeries that could interfere with healing or proper placement. They’ll observe how your skin moves when you sit, stand, or bend to ensure the piercing won’t undergo excessive tension or friction. Finally, they’ll evaluate the symmetry of your navel to make sure the piercing will be aesthetically pleasing and well-centred. 


Traditional Navel Piercings


Traditional navel piercings are the most popular and classic style. They involve a single puncture through the skin above the navel and below the upper rim, resulting in a vertical hole. The jewelry rests inside the hole, with the decorative ends sitting on the top and bottom of the navel.


Traditional navel piercings are well-suited for a variety of anatomies. However, the ideal anatomy for this style includes a distinct fold or crease above the navel, known as the upper rim or lip. This fold allows for a secure placement of the jewelry. The depth of your navel is also something to consider. A moderately deep navel provides enough tissue for the piercing to be comfortably placed without risking excessive pressure on the jewelry. 


Floating Navel Piercings


Floating navel piercings, also known as inverse navel piercings or top-down navel piercings, are a little different. The piercing is placed at the top of the navel and passes through the upper rim, creating the illusion of a floating piece of jewelry on the top of the navel ridge. The jewelry typically consists of a curved barbell with a small disk for a base and a larger top. Eliminating the large bottom piece of the jewelry ensures that pressure won’t be applied to the piercing channel, making healing easier and more comfortable.  This piercing style is typically suitable for those with a shallow or flat navel, where the upper rim is not as pronounced.


Conclusion 


Remember, the ultimate goal is to achieve a safe and well-placed piercing that will heal successfully, and complements your body. Prioritize consultation and communication with your piercer to ensure the best possible outcome. 


RSS icon Facebook icon Twitter icon Instagram icon Copy Link icon

Choosing the Right Initial Piercing Jewelry for a Smooth Healing

What You Need to Know


Getting a new piercing is an exciting experience—everything from choosing the perfect jewelry to the moment you see your fresh piercing for the first time! But most people don’t think about the importance of that first piece of jewelry.


Why does it matter so much?


When you’re getting pierced, the jewelry you start with isn’t just about aesthetics—it has to accommodate your body as it heals. The jewelry inserted into a fresh piercing is typically longer, or wider in diameter. When a piercing is first done, the body reacts by increasing blood flow to the area, which causes the tissue to swell. The extra length provides enough room for the swelling without putting pressure on the piercing, which could lead to irritation or complications. So, your first piece of jewelry might not be the piece of your dreams, but it's essential for a smooth recovery. Let’s dive into the key factors to remember when selecting jewelry for your new piercing!  


Function over Fashion: Picking the Right Jewelry

What Style Jewelry Do You Need?


There are lots of different styles of jewelry (see above). Your piercer will select the style that best suits your anatomy and the specific piercing. The correct jewelry ensures proper healing and comfort and minimizes the risk of complications like rejection. For example, curved barbells work well for eyebrow piercings because they follow the natural curve of the area, reducing tension. 

 
Not Too Big, Not Too Small.


Getting the right size and fit for your jewelry is crucial. If your jewelry is too tight—like a small ring—it can restrict the natural movement of your tissue, causing increased swelling and discomfort. This pressure can lead to irritation, inflammation, or even the jewelry embedding into your skin. On the other hand, jewelry that’s too big or too long can snag easily and irritate. Your initial jewelry should fit just right, giving your piercing space to swell, move naturally, and heal without strain or complications.


When to Change Your Jewelry


Switching your look early might be tempting, but wait until your piercer gives the green light. Healing times vary depending on the location, but early changes can disrupt the healing process and introduce new issues. When you’re ready to swap, make sure your new jewelry is high-quality and fits correctly to maintain your piercing’s health.


Choosing the right initial piercing jewelry is more than just aesthetics; it’s a crucial part of your piercing journey. By opting for high-quality materials, appropriate sizing, and professional guidance, you’re setting yourself up for a smooth healing process and a piercing you’ll love for years to come. 

RSS icon Facebook icon Twitter icon Instagram icon Copy Link icon

Why You Should Get Tattooed This Winter


Have you been thinking about finally getting that tattoo? Honestly, winter is the best time to go for it. Hear me out—I learned this the hard way last summer when I got a tattoo *right* before a trip. It was a total headache.  0/10 would not recommend it. Winter, though? It’s way more chill—literally and figuratively. It's the perfect time to commit if you've been considering a new tattoo.  


Why Winter is Prime Time for New Tattoos  


A major perk is reduced sun exposure. The sun’s UV rays cause damage to the skin and cause fading and discoloration of tattoos. Luckily winter means shorter days and fewer outdoor activities, so it’s easy to keep new tattoos covered and out of the sun. But I did say reduced sun exposure. Even in the winter, the effects of sun exposure are still present. The snow can reflect UV rays from the sun, doubling your exposure. So sunscreen is still a must for your tattoos and any skin peeking out. I know, sunscreen in winter feels weird, and people tend to skip it because the sun doesn’t feel as strong, but UV rays don’t take a holiday just because it’s cold. I’ve said it in other blogs; I’ll repeat it—DON’T FORGET TO APPLY SPF EVERY DAY. No matter the season.  


During the summer, heat and humidity can cause excessive sweating, irritating a fresh tattoo and potentially introducing bacteria to the area. But cooler temperatures eliminate sweating, so you can keep your tattoo clean and dry without worrying about sunburns or heat waves complicating your aftercare routine.


Speaking of aftercare, your existing tattoos will need some extra love in the winter. Cold, dry air and indoor heating can dehydrate your skin, leaving tattoos looking dull. To keep them vibrant, moisturize daily with a fragrance-free lotion or balm made for tattoos, and drink plenty of water to stay hydrated from the inside out. Avoid long, hot showers since they can strip your skin of moisture—stick to lukewarm water instead. When heading outside, protect your tattoos from harsh winds by keeping them covered, and don’t forget to apply SPF!

Healing in Time for Summer  


Best of all, a tattoo done in the winter has several months to heal completely, meaning it will be ready to show off when beach season rolls around.  


In the end, getting a tattoo in winter provides the best of both worlds: a gentler healing environment and the convenience of allowing your ink to be fully healed and ready to shine when summer arrives.  


So, if you’ve been on the fence, maybe this is your sign. Let’s make a plan for a new tattoo this winter—you’ll thank yourself when summer arrives.  


RSS icon Facebook icon Twitter icon Instagram icon Copy Link icon

The Truth About Hypoallergenic Jewelry


Does this sound familiar?


You put in a new pair of earrings, only to feel an annoying itch a few hours later. You shrug it off, but soon it’s impossible to ignore. Your ear is so swollen and itchy, you admit defeat and take them out.  Did you know these are classic signs of an allergic reaction?


Understanding Jewelry Allergies


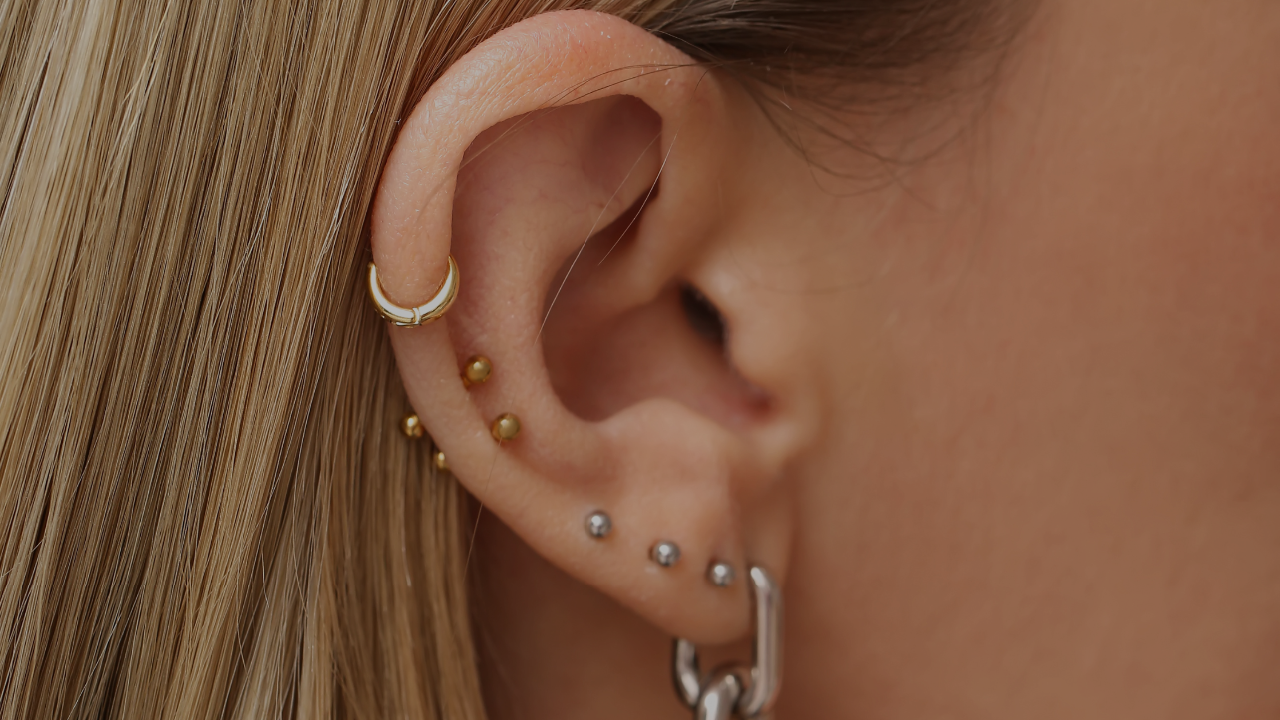
Jewelry allergies are reactions to metals that aren’t compatible with your skin. These reactions, called contact dermatitis, cause itching, redness, swelling, dry peeling skin, darkening skin and even small blisters around the piercing. The most common metal allergen is nickel, often used for costume and fashion jewellery. But while allergies are most common in costume jewellery, it’s still possible to experience reactions even if you opt for fine, or hypoallergenic jewellery. 


But What Does Hypoallergenic Mean?


According to Merriam-Webster- hypoallergenic means “having little likelihood of causing an allergic response.” So, hypoallergenic implies a reduced chance of causing an allergic reaction, but it’s not guaranteed to be completely allergen-free.


Signs of an Allergic Reaction


1. Redness and Swelling

The skin around the healed piercing site becomes red and swollen. This redness often extends beyond the immediate piercing hole, making the area look puffy.


2. Itching and Discomfort

You might feel an annoying itch around the piercing that can worsen if you touch or rotate the earring


3. Rash or Blisters

Small, raised bumps or blisters can develop, either directly around the piercing or on the skin touching the earring


4. Discharge or Crusties

Clear fluid may ooze from the piercing site as your body reacts to the allergen, sometimes causing a crust around the earring post or backing.


5. Pain and Sensitivity: Even light touch can become painful.

If you experience these symptoms, remove the earrings, clean the area gently, and switch to hypoallergenic earrings.


The signs of an allergic reaction to jewelry and the normal healing process of a fresh piercing can look very similar, which can make it tricky to tell them apart. You might notice redness, swelling, tenderness, and some discharge around the piercing site, all of which are typical as your body tries to heal a new piercing However, if you're having an allergic reaction, these signs tend to go beyond what’s normal. You may experience intense itching, a rash, or small bumps forming around the piercing, and the swelling might spread beyond the immediate area. The discharge can also be different—more noticeable, yellow or green in colour, and sometimes with an unusual smell—while normal healing discharge is usually light yellow or clear and forms a crust. Pay attention to how long these symptoms last and how severe they are; if they don’t ease up or get worse after the first few weeks, it could mean you’re reacting to the metal in your jewelry, and you should visit your piercer.


What Materials Should You Look For?


When looking for jewelry, prioritize metals that are less likely to irritate, such as the following options:


1. Surgical Stainless Steel

Surgical stainless steel (SSS) is one of the most accessible and affordable options for hypoallergenic jewelry. It’s made with low nickel content and is designed to be safe for body contact, making it an ideal choice for fresh or healing piercings. However, if you have a severe nickel allergy, consider another option.


2. Titanium

Titanium is lightweight, durable, and entirely hypoallergenic, making it ideal for sensitive skin. It is also used in surgical tools, implants, and joint replacements because it is biocompatible, which means it is unlikely to cause any reaction in the body. It is also the preferred material for body jewelry.


3. Niobium

Niobium is less common but is another safe choice for sensitive skin. It’s highly resistant to corrosion so it won’t react with your skin or the environment. However, some people may not love the colour.


4. Gold (14k or Higher)

Gold is a classic choice for piercing jewelry. However, only 14k or higher gold should be used, as lower karats contain a higher amount of nickel or other metals that can irritate. White and rose gold can sometimes cause reactions because of the alloys used to achieve their colour, so yellow gold is typically safer for sensitive skin.


5. Platinum

Platinum is hypoallergenic and extremely resistant to tarnishing, making it a luxurious yet low-maintenance option for piercing jewelry. Although it’s pricier than other options, platinum’s durability and hypoallergenic properties make it a worthwhile investment.


Metals to Avoid if You Have Sensitive Skin


If you’re prone to skin allergies or have experienced metal sensitivity before, steer clear of the following metals in your jewelry:


1. Nickel

One of the most common allergens, nickel is often mixed with other metals in alloys.


2. Copper

Though often used for its unique colour, copper can also cause sensitivity in some people. It tends to oxidize, which leads to greenish staining and skin reactions.


Let’s Talk About Gold


Since gold is relatively malleable, many pieces contain nickel or other metals to make the jewelry more affordable, durable and suitable for daily wear.


When it comes to gold jewelry, the karat rating is a key indicator of purity. If you’re sensitive to metals, opting for higher karat gold pieces may be beneficial, as they contain a greater percentage of gold and less of the reactive metals. The other metals gold is mixed with depends on the desired colour and can vary. For example, yellow gold can be mixed with nickel and silver. White gold with other white metals such as nickel, silver, and zinc. And rose gold is often gold combined with copper to give it that pinky/reddish hue.


What Does 'Karat' Mean?


The karat system measures the purity of gold, with 24 karats representing pure gold.


Here's a quick breakdown:


24 karat = 100% gold
20 karat = 83% gold
18 karat = 75% gold
14 karat = 58% gold
12 karat = 50% gold
9 karat = 37.5% gold


The higher the karat, the more gold, meaning it’s generally less likely to cause reactions in sensitive individuals.


What to Look for When Shopping


1. Check for Certifications 

Some manufacturers certify their materials, confirming that they are free from harmful metals. Look for brands that offer this information.


2. Be Careful with Coated Jewelry

Plating can wear off over time, exposing the base metal underneath, which may contain allergens. Solid pieces, or pieces with a known base metal are a safer choice.


3. Quality Craftsmanship

 Higher-quality pieces tend to use purer metals and better alloys, reducing the likelihood of skin reactions. Look for reputable brands known for their craftsmanship.


Taking Care of Hypoallergenic Jewelry


Even the best jewelry needs proper care to keep it in great condition. Here are some care tips:


1. Clean Regularly

Clean jewelry with saline solution or warm water to remove any buildup. Avoid harsh chemicals that could degrade the metal or coating.


2. Store Separately

Keep hypoallergenic jewelry in a separate compartment to avoid scratches and maintain its finish. 


In the end, finding jewelry that loves your skin as much as you love wearing it can feel like a game-changer. No more itching, redness, or frustration—just comfort and style. Now that you know what to look for, are you ready for the upgrade you deserve? Visit us in-store or online to explore our collection of skin-friendly jewelry, and let’s find the perfect pieces for you. 

RSS icon Facebook icon Twitter icon Instagram icon Copy Link icon

Costume Contact Lenses: What You Should Know


It's Halloween at Pi, and you know what that means—our shelves are stocked with a fan favourite: Primal Contact Lenses. With a variety of styles to instantly elevate any costume (or everyday look), we've got what you're looking for.


But, elevating your look is just the beginning – it’s important to properly wear, store, and care for your lenses to keep them in pristine condition and keep your eyes safe.


Ready to dive into the details? Let’s explore how Primal contact lenses can enhance your look and what you need to know to use them safely and effectively. Plus, some frequently asked questions from clients! 


First things first, prepare your lenses (and yourself) for wear. 


How to Prep Your Lenses 


1. Wash your hands thoroughly with soap and water. Dry them completely to avoid transferring any dirt or fuzzies into your eyes.


2. Open your Primal lenses, and make sure they’re free of tears or damage. Damaged lenses can harm your eyes. 


3. If you’re re-wearing your lenses, or plan to, you’ll need to purchase a bottle of lens solution. Give the lenses a quick rinse in fresh solution before you put them in. If it’s your first time opening them you can skip this step, because Primal lenses come packaged in a contact lens solution.


Now for the scary part...putting them in.


How to Put In Your Lenses 


1. Use your fingertip to handle the lens, making sure it’s sitting in the right orientation. It should look like a bowl or a crispy pepperoni, with the edges facing upwards, not flaring out. If it’s inside out, flip it. But if the lens is damaged, don’t use it.


2. With your non-dominant hand, either hold your upper eyelid open or gently pull down on your lower eyelid. 


3. Look up at the ceiling 


4. Place the lens on your eye, look around and blink a few times until it’s positioned correctly. 


It will feel strange, especially if you’re not used to wearing lenses, but the discomfort should fade after a few minutes. If it doesn’t, remove the lens, clean it, and try again. After they’re in, you can enjoy your new look for up to 8 hours. 


How You’ll Take Out Your Lenses

 I’m not going to lie-taking them out is more uncomfortable than putting them in. 


1. Start by washing your hands thoroughly with soap and water.


2. Use your non-dominant hand to hold your upper eyelid open. 


3. Look up slightly.


4. Using your thumb and index finger on your dominant hand, carefully pinch the lens and lift it off your eye. Be gentle to avoid scratching your eye or damaging the lens.


5. Immediately rinse and store your lenses.


Storing and Caring for Your Primal Lenses


Primal lenses can be reused for up to three months with proper care. So if you plan on re-using them, it’s essential to clean and store them properly to keep them safe for future use. 


Here's How:


After each use, clean them with contact lens solution and store them in a lens case filled with fresh solution– never reuse the solution or top it off. Your lens case should also be cleaned regularly and replaced every three months to avoid bacteria buildup.


Safety First:


Costume lenses are classified as grade II medical devices by Health Canada. Because they come into direct contact with the eye, strict safety and quality controls are needed to protect users. This classification ensures that lenses meet specific health standards to prevent complications such as infections or eye damage. 


Health Canada Recommends:

  • You use only licensed decorative contact lenses. You can verify if a brand is licensed by checking here 
  • Properly clean and disinfect your lenses as directed 
  • Never swap or share decorative contact lenses with anyone
  • Never sleep while wearing decorative contact lenses 
  • Contact an eye care professional if you have used decorative contact lenses and experience any redness, blurred vision, ongoing discharge or sensitivity to light


With the right care and handling, you can keep your eyes safe while showing off a unique look!


Client FAQ :


Are PRIMAL® contact lenses safe to wear?


Primal contact lenses are completely safe to wear. They are manufactured in regulated and standardized facilities in compliance with North American quality standards. They are authorized to be sold in Canada and the United States. 


Will these lenses show up on dark eyes?


These lenses appear vibrant on all eye colours. If you have dark eyes, you’ll be surprised by how fully the lenses cover your iris. Primal’s Halloween lenses, in particular, are designed with opaque, bold colours that completely mask your natural eye colour.


For a more subtle change, Primal also offers natural-coloured lenses that realistically enhance your eyes. The colours in these lenses are blended and layered to imitate the iris and have transparent sections that allow your natural eye colour to shine through. 


Will costume contacts impact my vision? 


Most styles have a clear center for your pupil so you can see through them with no problem! Certain styles like cat eyes change the shape of your pupil and allow less light into your eyes, but you can still see. There are styles with mesh over the pupil- these will obstruct your vision so it's best to wear them only for short periods. 


Have questions? Learn more on the Primal Website 


Contact lenses come tailored to different eye conditions and are available as a prescription. We recommend consulting an eye care professional to determine the best option for your specific needs. Always carefully review the instructions inside the box before using this product.

RSS icon Facebook icon Twitter icon Instagram icon Copy Link icon

Tattoo Prep 101: Essential Tips for Your Session


Preparing for Your Tattoo Session


Leading Up to Your Appointment...


  • No tanning
  • No exfoliation or body scrubs
  • Don’t shave the area yourself
  • Talk to your doctor if you take any blood-thinning medication, have a heart condition, or have diabetes. Always be honest with your tattoo artist about your medication and health. Your health is the #1 priority.  


The Day Before Your Appointment:


  • Avoid alcohol. Alcohol acts as a blood thinner, which can lead to excessive bleeding during the tattoo. This not only makes it harder for the artist to see the design clearly but can also affect the quality of the tattoo.
  • Drink water to keep your skin hydrated. It’s good for your health and hydrated skin takes ink a lot better than dehydrated skin. This will make the entire process a lot smoother for your artist.
  • Rest Up. Proper rest boosts your ability to handle pain, lowers stress, and keeps your immune system performing at its best, which helps with healing. Being well-rested also helps your body stay relaxed and steady during the tattoo session, allowing your artist to work more efficiently.


The Day Of Your Appointment:


  • Have a good meal. A well-balanced meal can prevent feelings of dizziness, light-headedness, or nausea due to low blood sugar. This is especially important for longer sessions.
  • Drink water! We encourage clients to ask for water and help themselves to our water cooler.  Keeping hydrated after your appointment is also beneficial and will aid tremendously in healing.
  • Show Up Sober for the same reasons as above. Plus, you’ll need to be sober to sign your consent waiver, and the artist has the right to refuse service if they suspect you’ve been drinking.


What You Need to Bring:


  • Valid Government I.D. You will need this for the waiver.
  • Bring a snack and something to drink, especially if it's a longer session.
  • Optional-Bring headphones. We promise you won't be offending anyone if you wanna zone out.
  • Method of payment. Ideally, cash so you can tip your artist!


What You Should Wear:

What we recommend wearing to your appointment depends on your tattoo placement. But generally, you want to avoid these two things; restrictive and light-coloured clothing. Tight, restrictive clothing will make it difficult for the artist to access the area, and light-coloured fabrics might get stained by tattoo ink and blood.


Here’s What We Suggest!


Arms

Your best bet is a dark t-shirt or tank top you don’t mind getting ink and blood on.


Chest and sternum

You might be comfortable removing your top, but if you’d prefer to cover your chest, we suggest clients bring an open-front shirt, cardigan, or zip-up hoodie. You’ll wear it open, but we can tape it in place to cover your chest. You could also wear a bralette or sports bra rolled upwards with the straps taken off your shoulders.


Ribs and stomach

A loose shirt folded upwards is a great choice for these spots. And when the sitting is over, the loose shirt will be nice to avoid friction on your new tattoo.


Legs, thighs, and hips

You’ll want to wear shorts, loose-fitting pants like PJs or joggers, dresses or skirts -The main thing is that your clothing can be easily pulled up, down or adjusted. Not only will you want something loose for getting tattooed, but you’ll want to have nice flowy clothes after your appointment, so your clothes aren’t rubbing against your new tattoo.


Butts

Again, you’ll want to wear loose sweatpants, shorts, or a skirt that can be easily pulled down or adjusted. You’ll want to avoid tight jeans, leggings, or any clothing that hugs the hips and butt. You can bring a blanket or towel to cover the exposed area and stay comfortable during the session.


Back

We suggest bringing a zip-up sweater or open-front cardigan and wearing it backwards! Your front stays totally covered but your back is out.


Feet

Flip-flops and sandals are the best choice. You don’t want to put on socks and boots over your new tattoo.


Final Thoughts.


A little planning can make a difference. Following these simple tips will help ensure you’re comfortable, that the process goes smoothly, and you walk away with a tattoo you love. Remember, your health, comfort, and the quality of your tattoo are interconnected, so take the time to prepare. We can’t wait to see you at your appointment!


Do you have any tattoo tips you swear by? Let us know!


RSS icon Facebook icon Twitter icon Instagram icon Copy Link icon